Tuesday 24 December 2013

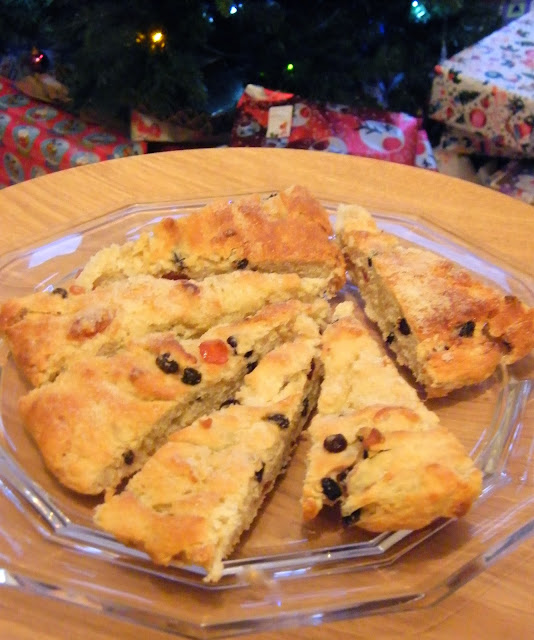
Holiday Focaccia


Ingredients:
500g strong white bread flour
3 tablespoons sugar
1 teaspoon salt
1 teaspoon grated lemon zest
1/2 teaspoon cardamom seeds
1 package active dry yeast
8 ounces warm water (about 50 degrees celcius)
2 tablespoons vegtable oil

125g glace cherries
75g flaked or chopped almonds
75g dried currants or raisins

Topping:
1 tablespoon melted butter
2 tablespoons sugar

Method:
In a large bowl of an electric mixer, combine 225g flour, 3 tablespoons sugar, salt, lemon zest, cardamom and yeast.  Add water and oil and beat for 2 minutes at medium speed.

By hand fold in cherries, almonds and currants and 225g flour.  Mix until dough comes together and pulls away from the sides of the bowl.

Turn out onto a lightly floured surface and knead dough 5 to 10 times.  Place dough in a greased bowl, turning to coat top of dough.  Cover with cling film and a towel and leave in a warm place to rise until doubled (about 1 hour).

Grease a baking tray.  Turn raised dough out onto greased tray and form into a ball.  With greased hands, stretch and press dough to form a 12 inch round.  Brush with melted butter.  Prick dough several times with a fork.  Cover with cling film and a towel and leave in a warm place to rise until doubled (about 45 minutes).

Heat oven to 200C/ 400F/ Gas Mark 6.  Uncover dough and sprinkle with 2 tablespoons sugar.  Bake for 15 to 20 minutes until golden brown.  Immediately remove from baking tray and place on serving tray to cool.  Cut into wedges with a pizza knife or serrated knife.  Lovely served warm :)

Enjoy!


Thursday 12 December 2013

Smilings my favourite.... and other Elf goodies


Thanksgiving is sort of a sore subject in my house.  It's one of my FAVOURITE Holidays.  I have so many fond memories of Thanksgiving with my Family in the States.  But I've lived in the UK for 9 years now and, lets face it, no one understands it here.  Which is understandable.  I mean until I lived here I never knew the joy of Fireworks Day and had never heard of Easter Monday.  An extra day off in the Spring, thank you very much.  But I still can't fight the little bit of sadness every year as Thanksgiving rolls around and I see all of my Friends and Family getting ready to celebrate.  

I have tried over the years to incorporate a little festive cheer into my household so that the day doesn't pass unnoticed.  We had a Roast Dinner, baked some cookies with the kids, decorated the Christmas Tree and watch a favourite Holiday movie.  This year I choose Elf.  I remember the first time I saw it, my little niece wanted to sleep over at my flat so we went to Blockbuster and I let her choose a movie. I could have never anticipated the pure joy and laughter that movie would bring to our evening.  It has remained one of my all time favorites.  So this year we curled up to watch Elf on Thanksgiving night.  

It was my Daughters school Christmas Fete the following weekend and her class was sponsoring the baking stall so I decided to make some Elf inspired Cupcakes.  I found this amazing little tutorial by Victorious Cupcakes with step by step instructions.  I love that even though I followed the same steps for each cupcake, the subtle differences gave each Elf his own little personality and character.  They where a hit at the fete and so easy to do.  If you fancy having a go you can find the tutorial here.


Elf funniest moments :)


Friday 27 September 2013

Lemon and Currant Cookies


Soft, delicious, delicate and bursting with lemon flavour, these beauties go perfectly with a cup of tea.

Ingredients:
125g unsalted butter
200g caster sugar
60ml sour cream
1 large egg
265g plain flour
1/4 teaspoon baking powder
1/4 teaspoon salt
75g dried currants
1 tablespoon lemon zest

Method:
Preheat oven to 160C / 325F / Gas Mark 3.  Generously grease 2 baking sheets or line them with baking paper.

Combine butter and sugar in the bowl of an electric mixer and beat until light and fluffy.

Beat in sour cream and egg.

In a seperate bowl, whisk together the flour, baking powder, and salt.  Add the dry ingredients to the butter mixture and beat until well combined.

Stir in currants and lemon zest.

Drop by heaping teaspoonfuls of dough about 4cm apart onto prepared baking sheets.  Bake until puffed and golden, about 20 minutes.

Sunday 1 September 2013

Rapunzel and her Magic Golden Flower Cake

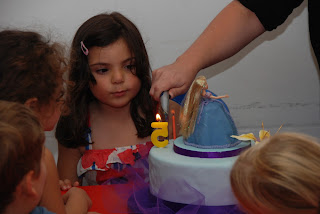
I planned for the first time for Ayla to invite her whole class to her Birthday Party.  I'm a complete social phobic so I was surpressing my anxiety big time in order for her to have a nice party.  And in the midst of it I forgot to take a picture of the CAKE!  I'm so annoyed with myself.  I have one pic taken the night before so it'll have to do.


This year Ayla wanted Rapunzel "outside of her tower".  I've said before I'm not a fan of doll cakes but here we are, the second year in a row and I'm making another doll cake.  But like before I've put my twist on it.  I wanted it to be frilly and girly like Ayla.  Anyone that knows her knows her fondness of tutu skirts.  That girl will try to make a tutu work with anything.


Rocking the Tutu

So I decided to decorate around the cake with a tutu.  I did this by hand stiching some tulle to gather it and then taping it to the board so that it would sit slightly under the cake.  My cake was a 10 inch round on a 14 inch board.  It took 2 meters of tulle to go around it.  I decorated my cake on a 10 inch card so that it would not sit directly on the tape.  

For the Rapunzel plaque I printed off a picture of Rapunzel in the size I wanted.  I then placed the picture under a piece of edible Rice Paper and painted (traced) the picture onto the edible paper using edibe lustre dust and confectioners glaze.  Then used a scalpel tool to cut out the picture from the rice paper and fixed to the icing on the cake.  

For Rapunzel I used a mini version of the Disney Store doll.  I baked the cake in a small oven safe serving bowl and carved it into the shape I needed.  

The thing that makes this cake for me is the Magic Golden Flower.  It was so simple to make and so effective.  


To make the Magic Golden Flower:   Instructions are very much like making a star gazer lily.  My lily tutorial can be found here.  The main difference is the centre.  

For the Centre instead of making the pistol and the stamen make the twirly bits in the centre of the Rapunzel Flower.  I did this by wrapping white floral tape around 22 guage wire and bending it into the shape I needed.  I made 3 twirly shapes and then taped the 3 twirls to a 18 guage wire using white floral tape.  I then used radient gold luster dust and confectioners glaze to paint the twirls gold.  Then once the paint was dry I went over it again with dry lustre dust to make the colour really pop.  

The petals are normal stargazer lily petals but dusted in shades of yellow, orange, gold and purple. 

So here she is, Rapunzel and the Magic Golden Flower.  Happy 5th Birthday Ayla!


Tuesday 30 July 2013

Stawberry Raspberry Jam

Aren't cousins the best :) Ayla just adores her cousin Alana and was driving me crazy to see her this weekend.  So I phoned my sister in law and they dropped by with a beautiful basket of fresh picked Strawberrys and Raspberries from the local farm on Sunday.  To return the favour I (and keep my kids busy) I decided to make a batch of Jam we could give them from the lovely berries.  If you've never made jam you should try it.  You just can't beat homemade.


You'll need some clean glass jars.  I like to recycle used jars and keep a few lying around for occasions like these.  I remove the labels and run them through the dishwasher.  When I'm ready to use them I wash the jars and lids with very hot soapy water then place them on a baking tray in the oven at 140C for 15 minutes to sterilize them.

While my jars where in the oven I measured out 500g of mixed strawberrys and raspberries.  


Then I poured them in a saucepan and added 500g Jam Sugar (that's sugar with pectin already added)


Then I scraped in the seeds from a vanilla bean pod


Then mix it all up.  I use a fork and mush the berries.  The kids will enjoy helping with this part.  


Once the berries are all mushed put the saucepan on medium heat and stir until the sugar is dissolved and mixture starts to boil.  Let mixture continue to boil for 5 minutes.  


Remove from heat and let cool for 10 minutes.  (Your jars should be ready to come out of the oven by now as well).


Fill your jars and allow to cool completely.  You can put the kids to work making labels :)


Monday 29 July 2013

Lemon Meringue Pie

Lemon Pie seems to be in fashion at the moment.  I was actually thinking of making one last week but put it off.  But in the last week I've seen post after post on FB, etc of Lemon and Key Lime pies so I have given in and whipped up my favorite version....


Ingredients:

For the crust:
1 packet digestive biscuits crushed
3 tablespoons butter melted

For the filling:
2 14oz cans sweetend condensed milk
200ml fresh lemon juice
Zest of one lemon
8 egg yolks

For the topping:
8 egg whites
100 grams caster sugar
1 teaspoon cream of tartar

Method:

Crust:
Crush the digestive biscuits into a fine crumb.  You can use a food processor, but I just poured mine into a bowl and crushed with a heavy drinking glass until I had a fine crumb.  Melt 3 tablespoons butter and pour into the biscuit.  Mix well and press into a 9 inch pie plate.  Bake at 180C /350F/ Gas Mark 4 for 10 minutes.   Remove from oven and prepare your filling.

Filling:
Combine the condensed milk, egg yolks, lemon juice and zest in a bowl and whisk until smooth.  Pour filling into prepared pie crust.  Bake at 180C/ 350F/ Gas Mark 4 for 10 minutes.  While your filling is in the oven prepare the meringue topping.

Topping:
Place eggwhites, sugar and cream of tartar in the bowl of an electric mixer.  Whisk on high speed until stiff peaks form.

Remove pie from oven after first 10 minutes.

Reduce the oven temperature to 150C/ 300F/ Gas Mark 2.  Spoon meringue onto the top of pie spreading all the way to the ends.  Use as much as you like, you may not need to use all of the meringue.  Use the back of a spoon to form peaks on the meringue.  Place pie back in oven and bake for approx 20 minues.  Keep an eye on it and remove when meringue is golden.

Cool completely then refridgerate over night (or at least 4 hours) before serving.


Monday 8 July 2013

Probably the most delicious Mint Chocolate Chip Ice Cream recipe ever ...............


and its sooooo simple to make!

What you'll need:
225ml whole milk
160g sugar
a big hand full of fresh mint, washed
5 egg yolks
600ml double cream
chocolate chips

In a saucepan, heat the milk and sugar while stirring until the sugar is dissolved, do not boil.

Remove from heat, set aside a couple of mint sprigs and add the rest of the mint to the milk mixture.  Let sit covered for 1 hour.

Seperate the eggs and place the egg yolks in a small bowl.

Return mixture to medium heat and stir for 1 minute.  Add a bit of the milk mixture (about 60ml) to the eggs a little at a time.  This is to slowly raise the temperature of the eggs so they won't cook when you add them to the milk.  Add egg mixture to the milk stirring constantly until the mixture thickens into a custard that coats the back of a spoon.  Remove from heat.

Pour the double cream into a medium bowl.  Put a fine sieve on top and pour the milk mixture into the cream through the sieve.  Discard any bits that do not go through the sieve.

Give it a stir and add the reserved mint sprigs to the mixure.  Refridgerate over night.

Remove the fresh mint  and add a bit of green food colouring, if desired,
before freezing in an ice cream maker.  Mix in chocolate chips and pour into a freezer container.  Freeze for 4 hours before serving.

Don't have an Ice Cream Maker? Don't worry!  You can still have yummy home made ice cream, it just requires a bit more elbow grease.   Pour the Ice Cream mixture into a freezer container.  Remove after 30 minutes and give it a good stir making sure the break up any frozen bits.  Continue this process every 30 minutes for 3 hours.  Then let the mixture freeze for 4 hours before serving.


Saturday 6 July 2013

Mommy I want Dora Cake...

I don't know why I thought I could talk him out of it.  My Son LOVES Dora.  And truthfully, it doesn't bother me that he is a bit obsessed with the cartoon.  I could think of worse things.  But all the party stuff looks so girly.  So I tried for over a month to convince him he wanted something else.  A conversation would typically go something like this.

Me browsing at pics on the computer:  Ohhh Evren, look at these cakes.  Do you like Spiderman?
Evren walking over to the computer:  I like cake.
Me while showing him pics of various cakes on the computer: What kind of cake do you want for your Birthday?  Do you want a Spiderman Cake
Evren: Nooo
Me: Do you want a Super Hero Cake
Evren: Noooo
Me: How about a Monster Cake?
Evren:  No Mommy, I want Dora Cake!

I might manage to distract him for a brief moment, but he would always come back to it.  So I gave in.  It had to be Dora.  So here is my attempt at a hopefully not too girly Dora Cake.


And just look at that grin :)  Priceless!


 Happy 3rd Birthday to my sweet little Man.


Saturday 11 May 2013

Happy Pretend Birthday to Me!


I love sharing new tips and techniques I pick up along the way.  This one was truly one of those "why did I never think of that" moments.  I have always greased and floured my cake tins.  If you bake as often as I do, you get through alot of butter.  Save those butter wrappers and use them for lining your cake tins.  I was skeptical so I had to try it out.  


 I made some Swiss Meringue Buttercream and had a couple of wrappers left.


I pressed the wrapper in my tin and went around the edges with a sharp knife to trim the wrapper to the size of my tin.  

 And placed it Butter side up in my tin.


Then baked my cake.  

 I went around the sides with a knife to loosen them before tipping out onto my cooling rack.  


The wrapper peeled write off and my cake was perfect and did not stick to the tin at all.


I was recently the lucky recipient of a Dinkydoodle Airbrush :)  So this was my practice cake to get the feel for using my new airbrush.  The airbrush is amazing.  Love that I can get multitone effects on the icing.  You just couldn't get this effect colouring the icing the old fashion way.  I can't wait to have more projects and really get into using this amazing new tool.  Thank You Dawn!


LOL, I just had to share.  My daughter came up to me while I was typing this to inform me it is my pretend Birthday today.  I told her that was amazing and lucky because we have a pretend Birthday Cake.  So I guess we need to celebrate.


Happy Pretend Birthday to Me!


Tuesday 7 May 2013

Chocolate Transfer Cupcake Wrap


 At Cake International in London a few weeks ago I picked up some chocolate transfer sheets for the first time.  I decided to try making a cupcake wrapper to experiment with them.  It was surprisingly easy and a very visually pretty and effect way to simply decorate a cake.  

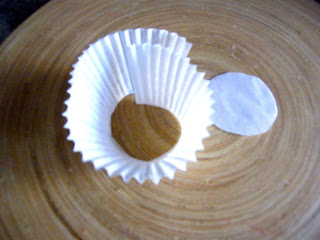
You can find templates for cupcake wrappers online, but to be sure mine fit my cupcake I simply cut out one of the cases I was using to bake my cakes and traced around it. 
 
  
I traced 2 wrappers and made my outlines slightly taller and longer than my actual case.  


I cut out  both shaped and taped one together.  Set the taped one to the side, you will use this to help your wrapper hold its shape while it dries later. 


Take the other cut out and use it as a template to cut out your chocolate transfer sheet.  


Place the transfer sheet on a piece of baking paper.  Melt you chocolate and spread it as evenly as possible over your transfer.  Here I have used candy melts.  Please note if you are using actual chocolate you will want to temper your chocolate before using it on your transfer.


Leave to dry slightly for a couple of minutes, then carefully lift your transfer off the baking paper and place in the paper cup you made earlier to form your wrapper.  Slightly overlap where the ends meet.  Place in the fridge for 15 minutes to set. 

 When set, remove from the fridge and carefully remove the plastic backing from your transfer.  Note I said carefully :)  I manged to slightly damage mine at the end where the pieces overlap.  But it was OK, once it is iced it will still look lovely.   


 Remove the paper case from your cupcake and place your cupcake in your new edible chocolate wrapper.  


 Ice decorate and enjoy :)